
A practical guide to waxing and ski prepGood is good enough. A good wax job gives you fast glide and solid kick to make skiing more fun. This is pretty straightforward most of the time. You can always invest more money and time to make your skis a little faster, but this can be a slippery slope toward poverty, insanity and diminishing returns. Unless you're vying for the win at Junior Nationals, SuperTour or beyond, there's no need to pull wax-room all-nighters, carry a fleet of skis, convert your savings into nano-ceramic products or drive to races in a 2-story wax truck (though that does look pretty sweet). This guide will help you prep skis that are plenty good for the skiing 99%, and then get out of the wax room and onto the snow!
|
|
Ski prep for glide
There are 2 parts to preparing fast-gliding skis:
- Glide wax reduces friction on the snow - solid paraffin waxes are melted into the ski base with an iron, and the excess is scraped off and brushed. You'll do this at home before races, when you get new skis, and periodically for maintenance when ski bases get dry, dirty or thirsty. Liquid waxes are applied as a thin layer on the ski base (no ironing or scraping), and polished with a brush and/or fleece. As fluorocarbon waxes are banned, liquids and fleece-applied waxes are becoming the preferred final layer for racing - durable and fast!
- Structure breaks the suction between the ski and snow - higher-end skis come with long-lasing structure from stone-grinding. Temporary structure can be applied after waxing (mainly before races). The club has tools for this and we can help.
Choosing your glide wax. Glide waxes come in many varieties designed for different snow conditions (dictated by temperature, humidity, new/old/artificial snow). For everything besides high-level racing, a simple line of 3-4 waxes covers most conditions well – brands like Swix, Toko, Rode and Start have basic paraffin wax lines that are easily available online (all similarly good). If you're new to glide waxing, it's reasonable to start with 1 or 2 waxes that cover the most common conditions, and build from there as you get more serious.
To iron or not to iron? That is the question as the fluoro-free world increasingly shifts from ironed-in solid waxes to liquid and fleece-applied waxes. What's the difference?
- Serious racers and wax technicians will probably use a combination of liquids and fleece-applied waxes over ironed block waxes for optimal speed and durability. Which new products and application methods are fastest for specific conditions is evolving through relentless testing, and little is established so far. A helpful and relatively up-to-date review of one club's testing is here.
- Waxing exclusively with liquids is a simple alternative for those new to the sport who want to keep skis fast and fun for any-time skiing. 2-3 of the basic (least expensive) liquids such as those from Rode or Swix can cover most conditions well with minimal work - and were often the go-to glide wax for many of NY's serious junior-level racers last season. If you're new to skiing, don't have a dedicated waxing area, iron and tools, and/or just want to make the fastest skis in the least amount of time, liquids are a good way to go!
To iron or not to iron? That is the question as the fluoro-free world increasingly shifts from ironed-in solid waxes to liquid and fleece-applied waxes. What's the difference?
- Solid paraffins ironed into the ski dissolve into the ski base and actually change the properties of the base material (mind blown? mine is!). This continues to be important for prepping and maintaining ski bases.
- Liquids form a thin film on top of the base and are generally faster than ironed paraffin as a final layer(s) on the snow. Solid blocks formulated to be applied to the ski by buffing with lamb's wool fleece achieve the same effect..
- Serious racers and wax technicians will probably use a combination of liquids and fleece-applied waxes over ironed block waxes for optimal speed and durability. Which new products and application methods are fastest for specific conditions is evolving through relentless testing, and little is established so far. A helpful and relatively up-to-date review of one club's testing is here.
- Waxing exclusively with liquids is a simple alternative for those new to the sport who want to keep skis fast and fun for any-time skiing. 2-3 of the basic (least expensive) liquids such as those from Rode or Swix can cover most conditions well with minimal work - and were often the go-to glide wax for many of NY's serious junior-level racers last season. If you're new to skiing, don't have a dedicated waxing area, iron and tools, and/or just want to make the fastest skis in the least amount of time, liquids are a good way to go!
|
Basic iron-in glide wax kit covers most conditions for training and intro racing. .
|
Liquid glide waxes (bold: positive reviews from early testing) Reliable coverage across a range of conditions:
Toko Base Performance Blue (<14°), Red (10-25°), Yellow (warm) Swix HS6 (10-25°), HS7 (19-28°), HS8 (25-40°), HS10 (32-50°) Start RG Race Blue (5-21°), Violet (18-28°), Red (28-50°) Rex G41 (manmade snow in wide range of temps) Fleece-applied solid waxes (for advanced waxers/racers) Ulla Red/black (artificial snow), Star Med (18-27°), Star Warm (25-32°, new-falling snow) |
Notes:
-If you're starting out, pick one of the wax lines, start with the italicized wax to cover common conditions and expand from there.
-Waxes containing fluorocarbons are now banned due to health and environmental risks at virtually all races besides the World Cup (and there too as soon as reliable methods to test for them are established). This includes LF (low-fluoro) and HF (high-fluoro) waxes and several fluoro-containing kick waxes and klisters. Some of these products are still available, but there is no reason to buy them anymore. Using them for BKL, high school, or local racing is absolutely inappropriate.
|
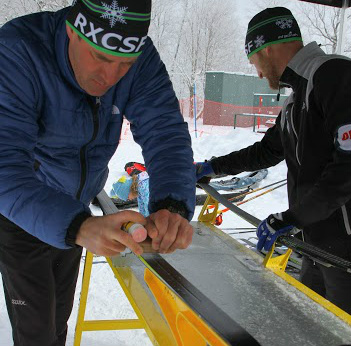
Applying glide wax with an iron. The basics are easy:
When to glide wax
Racing: Before each race (usually the day before) use the wax best matched to the predicted snow conditions. One layer is fine if you’ve maintained your skis well (see below). Practice: You do not have to glide wax for every practice - wax often enough to keep the skis moving well and prevent the bases from drying out and filling with dirt. How often depends on how much you ski, how abrasive and/or dirty the snow is, how well your skis hold wax, and how much you care. If your ski bases are turning white they’re drying out and you should add more wax. If your skis have slowed down after a temperature shift you’d have more fun after re-waxing to match the new conditions. If your ski bases get filthy, clean them and rewax. Softer waxes (for warmer weather) melt more easily into thirsty bases and are good for routine ski maintenance. When you get new skis: Brand-new skis have dry bases that are itching to be filled with wax - softer wax for warm conditions works best. Definitely glide wax before skiing on them, and if you’re getting higher-end racing skis it's worth multiple layers of wax to saturate the bases. Here's a guide to the full-on process (most of us civilians do fewer layers). |
Glide waxing tools.
• Electric Iron – to heat glidewax into the base. Irons designed for waxing (e.g. by Toko or Swix) heat evenly and won’t scorch the ski bases. Old clothes irons may be sneered at by purists (less predictable heat) but are cheap and used by many – be extra careful not to overheat the skis (and clean out any steam holes while the iron is hot). • Plastic scraper - 3-4 mm thick plexiglass to scrape wax off the top of the base, leaving what’s in the base. • Groove scraper – curvy tool to scrape wax from the groove in the ski base. Klister spreaders (free with each tube of klister wax) work great, groove pins, or you may get away with curved corners of a scraper. • Brushes - optional, but really helpful for removing wax from the fine structure in the bases and getting a smooth polished finish. A brush with horsehair or stiff nylon bristles is good as a starter (Swix/Toko or even just a scrub brush). As you get more into it, a nice copper or fine steel will become your fave and a softer nylon brush (or Toko thermo pad) for polishing. See here for more details. • Glidewax Base cleaner – optional, but nice for cleaning dirty/old wax out of your bases. StructureThe pattern of texture in the ski base that breaks surface tension with the snow and makes a huge difference in warm/wet conditions (arguably more important than glide wax). Most new higher-end skis will come with a basic stone-ground structure. Additional (more temporary) structure can be pressed into the ski after waxing with a tool like this, using different structure patterns depending on snow conditions. The club has these for use at races - families getting seriously into racing may consider getting their own.
|
Waxing for kick
Kick wax is pretty straightforward in most conditions. Don't be ashamed if you have trouble on slick/icy/melty days - we can help.
The first choice is whether to use hard wax or klister. Hard wax is used for newer snow that hasn't transformed (gone through freeze-thaw cycles to become like a snow cone). Klister (honey-like wax in tubes) is for icy/transformed snow, and very warm/wet snow when hard wax doesn't work. If you're just getting into waxing, it's OK to let the club handle klister - you'll learn to love it over time!
The first choice is whether to use hard wax or klister. Hard wax is used for newer snow that hasn't transformed (gone through freeze-thaw cycles to become like a snow cone). Klister (honey-like wax in tubes) is for icy/transformed snow, and very warm/wet snow when hard wax doesn't work. If you're just getting into waxing, it's OK to let the club handle klister - you'll learn to love it over time!
Which kick waxes to get? There are many choices, but you only need a few hard waxes to cover below-freezing conditions very well. For snow around or above the freezing point, kick gets more finicky and the range of options explodes - start with a couple of waxes to cover that range reasonably well when skiing on your own, and the club wax box will fill in the gaps at practices and races. Recommendations below in bold are easy to find locally and will make a good beginning set, while those in italics are some of my personal favorites.
|
Hard wax: < 15° F - Toko Blue or Swix Green (V05) or Rode Green & Multigrade Blue 15-28° F - Toko Red or Swix Extra Blue (V30) or Rode SuperBlue 29-32° F - Swix Violet (V50) or Rode Violet > 32° F - Basic: Swix Red Special (V55) and Red/Silver (V60) Advanced: Swix VP55/60/65 Rode VO, VPS, VXPS Basewax - Toko Green (improves durability as a base layer, and can kick on its own in tricky 30°'s conditions if applied thick) Klister: Swix Universal K22 (27° to 50° - wide-range universal klister) Swix Blue Ice KX30 (for icy snow below freezing) or Rex Blue Swix Red Extra Wet KX75 (for when it's too warm/wet for K22) |
Kick wax tools: • Fine grit (>150) sandpaper • Synthetic cork - to smooth hard wax • Kick wax scraper or putty knife - to remove hard wax • Wax remover - to clean up sticky wax • For klister, if you dare:
|
Notes:
- If you're daunted by the number of waxes, start with Toko Red (< 30°), Swix Violet (30-32°), and Swix Red/Silver(32-38°).
- In warmer conditions I haven't found Toko waxes (yellow, and klisters) as useful as other brands, though many have them and they can work. Beware of thick layers of yellow when it's still fairly cold - this can ice up, and not kick or glide.
- Note the Swix VR wax line and some other old faves line contained fluoros and are now banned. Swix VP waxes are fluoro-free alternatives.
Applying kick wax. Kick wax is applied to classic skis in the wax pocket, the area held off the snow by the camber of the ski during gliding, and presses into the snow when you weight the ski during the kick. This is in the middle of the ski - from the heel to one boot length in front of the binding is a good place to start (we can refine this lat. Mark the wax pocket with a Sharpie on the sidewalls of the ski. You will glide wax the tips and tails of the classic skis, and then can prepare the base of the wax pocket by sanding lightly with fine (>150 grit) sandpaper.
|
Hard wax:
Choose the wax according to temperature. Crayon onto the base over the length of the wax pocket. Smooth with cork (pressing hard helps). Several layers is usually better than one gobby thick one. Tips: You can improve kick by
If you're not kicking at all, choose a warmer wax. If your warmer wax is icing, cover with a thin layer of colder wax. In rough/abrasive conditions, a layer of basewax helps wax stay on. |
Klister: heat the tube (torch or heat gun) to soften the klister. Dab klister in dots or dashes about 1 inch apart on the ski base in the wax pocket (shorten the usual pocket by an inch at the back and 2-3" up front). Start skimpy - you can always add more klister if needed, but a little usually goes a long way. Warm the klister and spread in a smooth thin layer using a thumb (or klister spreader for the squeamish). Let cool before putting it on the snow (otherwise it'll ice up and not work).
Tip: In some conditions (eg icy but with fine-grained snow on top) klister will ice, but works great when covered (after cooling) with a layer of hard wax - cork this gently to keep the klister from mixing to the surface. Safety tip: Some klisters contain fluorocarbon additive (this is clearly marked on the tube, and does not include any we'll use with the club). DO NOT heat these with a torch, as open flame can degrade them and release toxic gases. Use a heat gun instead. |
Removing kick wax: Clean your wax pocket well before glide waxing, after using klister, and when switching from warm to colder waxes. For practices it's usually OK to add a layer or 2 of the day's wax to what's on there from yesterday.
-Hard wax: scrape with a thin kickwax scraper or putty knife (the sharper point helps compared to a thick glidewax scraper - be careful not to gouge the base).
-Klister:
-Hard wax: scrape with a thin kickwax scraper or putty knife (the sharper point helps compared to a thick glidewax scraper - be careful not to gouge the base).
-Klister:
- Easiest method: scrape some up with a klister spreader if you can, then wipe with rags and a lot of wax remover.
- Alternate method: heat with a torch/heatgun and wipe off with a rag. Repeat until clean. Be careful not to melt your bases.
- Coach Dave's Method: press toilet paper (or paper towels, or newspaper) into the klister to sop up the gooey-ness, then try to scrape it all off with a kickwax scraper. Liberal use of wax remover recommended.
Manuals and demo videosGuide to Ski Maintenance from CSU coach Rob Bradlee (courtesy of Ford Sayre BKL) - good overview of waxing, cleaning, and tools.
Ski prep manuals: - Swix basic, or advanced - Toko ski prep info center Introductory waxing videos (from Eastern Mass Bill Koch):
Waxing basics - http://www.youtube.com/watch?v=P0cL58pRmjA Making a wax bench - http://www.youtube.com/watch?v=vcdf4ITsMNY Applying klister - http://www.youtube.com/watch?v=Bu9g-tO2DE4 Taking off klister - http://www.youtube.com/watch?v=a8ZNaT6EW6I Applying kick wax - http://www.youtube.com/watch?v=O5pZOhgZXMA Applying glide wax - http://www.youtube.com/watch?v=2embBp-IBSk Scraping glide wax - http://www.youtube.com/watch?v=lo5EE8x_y0I |
|
